

If you are wondering ‘can you vinyl wrap a desk?’, you certainly can. Vinyl wrapping a desk is a great alternative to paint, and I’m going to take you through how exactly to vinyl wrap a desk.
Vinyl wrapping can transform an old desk completely and bring it up to the aesthetic of the rest of your office. There are huge range of designs available on vinyl wraps, so you can go for something colorful or lowkey to replace the look of your old furniture.
Certain desks can be harder to wrap than others, and some desks will look better painted than with a modern vinyl wrap. However, in many cases, a wrapped desk can look more natural and offer a better working surface than if you were to paint your desk.

If you have never done this before, you may find that it helps to have assistance from a friend or family member. Extra hands can be helpful and may make the process more successful. With that in mind, let’s show you how to wrap a desk in vinyl for your workspace.
Step 1: Measure The Vinyl
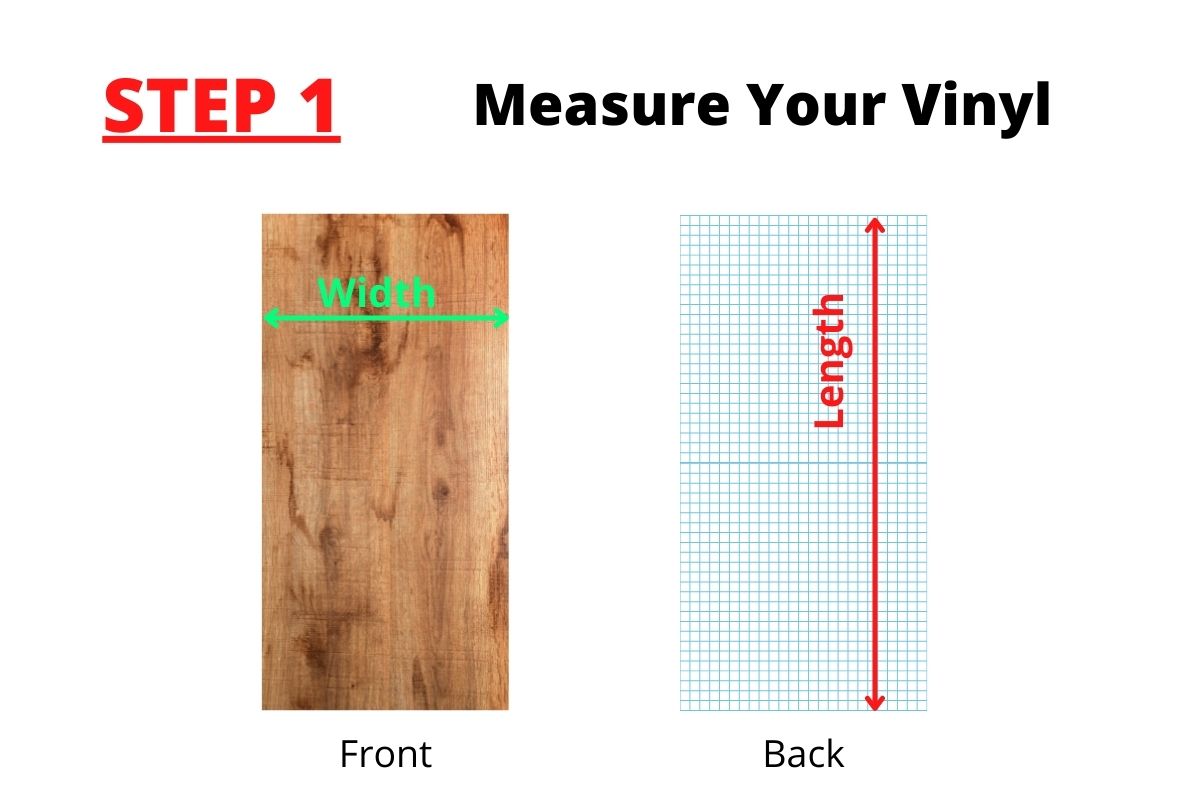
Once you have purchased your vinyl wrap (you’ll be surprised how many types of vinyl wraps there are), the first thing you need to do is double check you have enough vinyl to cover the surface of the desk. This is easy to do if you have a flat surface, but if your desk has any drawers or extra cupboards, you will need to check those areas too. You can learn more about desk dimensions here.
You can make sure that you have enough vinyl by lying the sheet flat on the desk and checking that you have overlap on every side. Make sure you account for the thickness of the tabletop too, your wrap needs to cover the edges to be able to protect your furniture.
When you fold the sides of the vinyl down, you should have enough vinyl to tuck underneath the desk so that the end of the vinyl will not be visible. If you don’t have enough, get some more vinyl before you start.
You may find this is best done by getting someone to hold the edges or pegging it down. Don’t peel the backing off at this stage; you are just checking you have enough vinyl.
Step 2: Cut The Vinyl To Size
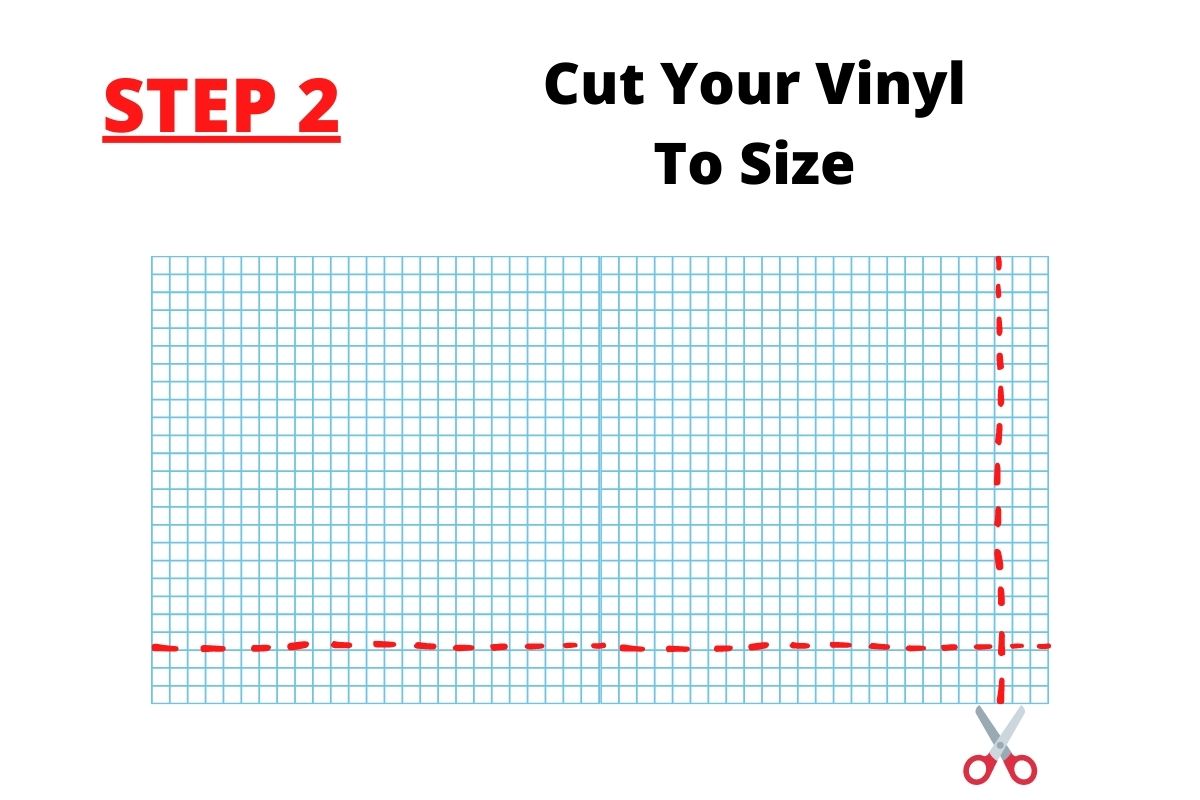
Use a sharp knife or pair of scissors to trim down the vinyl until it’s a suitable size. You need to make sure that you are getting straight edges for this, so you may wish to use a ruler and pencil to draw in the backing tape. If your edges are wobbly, it will be much harder to get the vinyl straight on the surface.
You will also be at more risk of creases and messy edges. Your vinyl will likely have a grid drawn on the backing tape, so make sure you are using this as your guide while you cut. It will stop you from going off course. Marking the line you want to cut along with a ruler and pencil should help too.
You can always cut off more later, so be conservative. If you are planning to wrap the sides of your desk as well, make sure you account for them also.
Your scissors need to be nice and sharp before you start cutting, or you may find that they don’t go through the vinyl properly.
Step 3: Score The Vinyl Backing
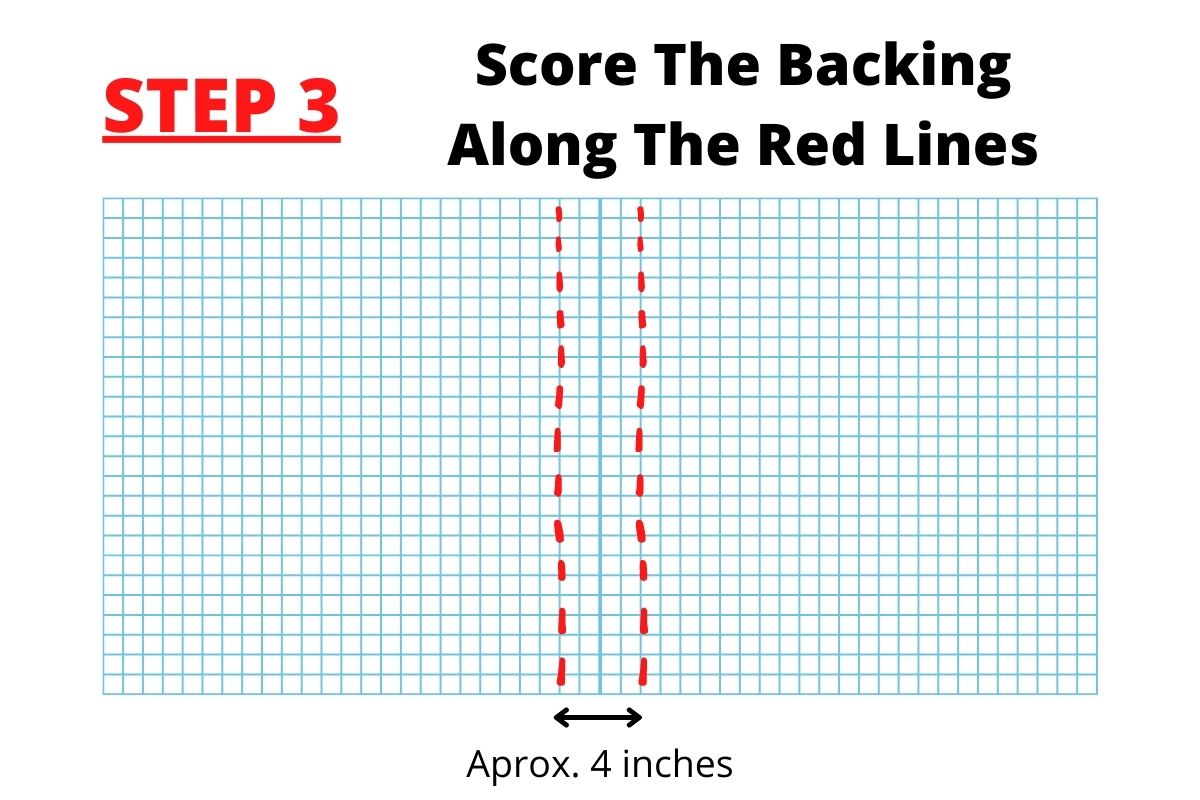
This step is technically optional but simplifies the entire process massively. It makes it easier to apply the vinyl smoothly to the surface of the desk.
To begin with, you should lay the vinyl on a flat surface and get a sharp blade. Your goal is to break through the vinyl backing, but not the vinyl itself. This is so you can peel away the central section of the weap and stick this down first.
Just cutting the backing is easier with certain vinyl wraps, but if you are gentle you should be able to do this and protect the patterned side of the material.
Locate the central point; this is where you will cut across the width of the backing. Use your blade to score neatly across it, using the grid on the backing or a ruler as your guide. We recommend using a specialized vinyl knife like some of these from tools4flooring.
Next, do the same thing again 4 inches from the first strip, so that you have two parallel lines scored through the backing. This should separate a central strip from the rest of the backing. Leave the backing in place for the time being.
If you don’t want to use the strip method seen in the video, you’ll find a basic installation guide that doesn’t use this method here. Follow this instead, and skip over Step 4.
Step 4: Line The Vinyl Up And Start Sticking It
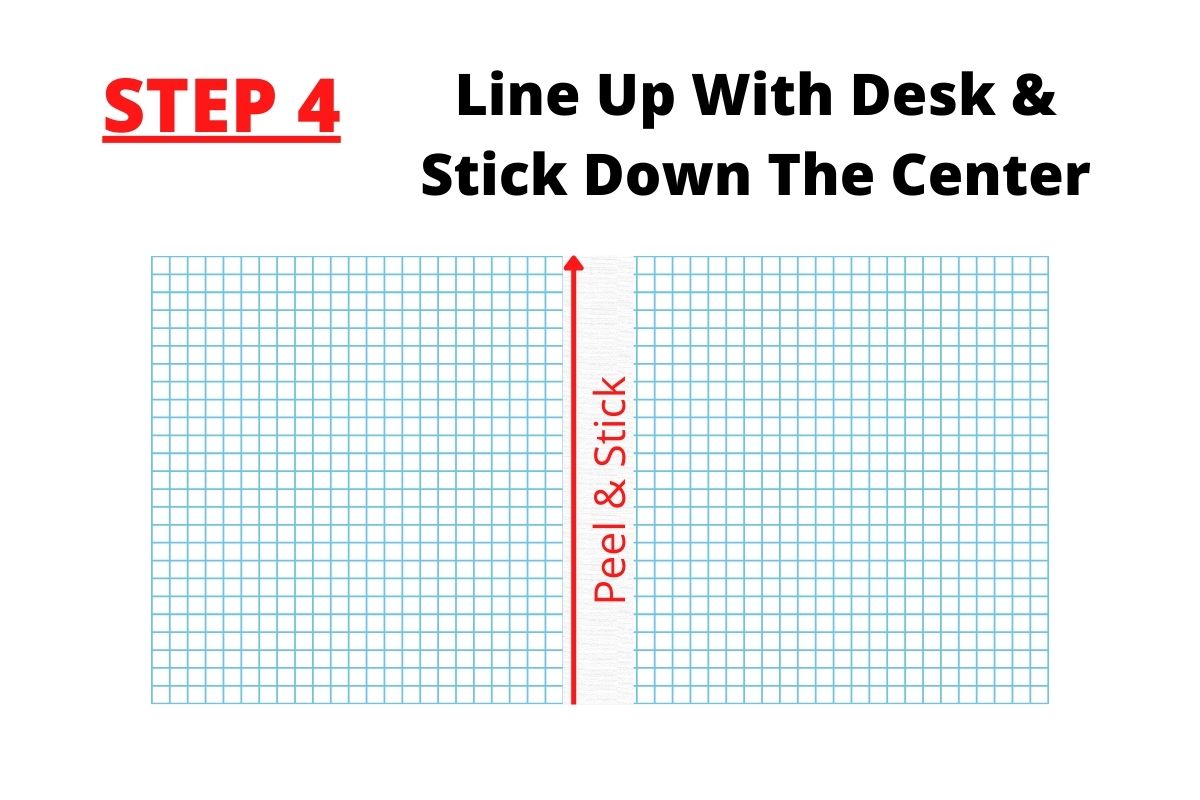
Set the vinyl back on the top of the desk and make sure that it is lined up so you have sufficient vinyl around all the edges of the desk. It is worth doing a double check here, as you will probably ruin the vinyl if you have to pull it off again because something has gone wrong.
Next, put your hand firmly on the left hand side of the vinyl and roll the other side back so you can access the strip that you cut. Peel off the backing and set it aside, and then lightly press the strip of stickiness you have revealed against the surface of the desk.
Run your hand up and down the strip to make sure it is tacked into place, and then check that both of the edges still line up. If they do, move on to the next step.
Step 5: Peel & Stick Each Half Of The Backing

If you have used the strip method, you can now take the half of the backing that is easiest to access and gently peel it back a few inches. Stick the newly exposed underside of the vinyl down, and peel back some more of the backing.
Make sure you are stretching the vinyl out as you peel. If you have a second person, they can use any flat surface (e.g. a credit card or a tool specifically designed for the job) to smooth out the area you have stuck down and make sure there are no bubbles in it.
Work slowly and watch what the other person is doing so you don’t get ahead of them. If you don’t have a helper, use a tool yourself, but make sure you are only taking off a little backing at a time. This will give you more scope to smooth out the vinyl that is being stuck.
Repeat this process on the other side, and the surface will be fully covered. If you didn’t use the strip method shown in the video, simply peel the backing off gradually and lay the vinyl as you go.
You can see this in action in the video below.
Step 6: Stick Down The Corners
Use your thumb to locate the corner of the desk beneath the vinyl. Next, take a sharp knife and cut from the corner outward, until you reach the edge of the vinyl. Make sure you cut right through at a 45 degree angle.
Pull one side of the cut piece firmly down against the edge of the desk and use your thumb to press it down. Wrap any overlap around the corner and press it down hard. Use your knife to trim off the excess that would otherwise wrap under the desk.
Do the same with the other flap, using your thumb to push the air out. Cut off the excess and check that your corner is smooth and firm. It’s easier than it all sounds, you can see the method described carried out in the video below.
Step 7: Stick Down The Sides
The final step of how to vinyl wrap a computer desk is covering the sides. They are the only parts that remain unstuck. To smooth these down, use a tool or your hand and start firmly pressing one edge of the vinyl down against the desk. Start at one end and work your way along. Go slowly so you can correct any bubbles.
Do this all the way around the desk, until each edge has been covered. You can use your knife to trim off excess vinyl at this point. Some people like to apply heat to see if there are any bubbles in the surface, but otherwise, your desk should now be wrapped.
If you want to protect your new desk surface, a desk mat could be perfect for the job, find out why you need a desk mat here.